Menu setup
The menu can be created in two ways:
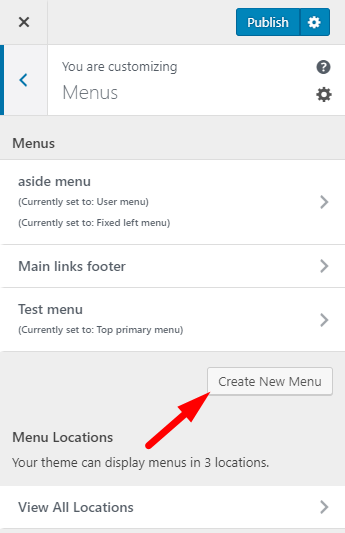
- Via Customize> 'Menus' tab. This is a simplified menu editor. You can create menus, add menu and submenu items, reorder them, and assign the menu to the primary menu location.
- Via Appearance>Menus section. This is an extended menu editor. Besides, the above-described possibilities, you can add icons to your menu items and create mega menus.
Simplified menu editor
- Click on the 'Create New Menu' button, type name, choose menu location (the place you want this menu to appear) and hit the 'Next' button.

- Begin adding menu items by clicking on the 'Add items' button.
- Choose items among available page types from the popped out right panel.

- Once the items are added, you can reorder them and create submenus with simple drag-and-drop function.

- When your menu is ready, hit the 'Publish' button.
Extended menu editor
In order to create a menu via the extended editor, follow the next steps:
- Go to Appearance>Menus section in your backend editor.
- Click the create a new menu link at the top of the page.

- Enter a name for your new menu in the Menu Name box.
- Click the Create Menu button.
Adding menu items
Once a menu is created, you can add items into it. On the left column, you can find different custom links, pages or categories that can be used as menu items.
- Select the Pages (or another) tab.
- Press the View All link to bring up the pages published on your website.
- Select the pages you want to add by selecting the checkbox next to each page title.
- Click the Add to Menu button to add your selection(s) to the menu that you've just created.

- Click the Save Menu button on the right hand side once you have added all the menu items you want.
Adding icons to the menu
If you want to add icons to your menu, click on the triangle symbol in front of the menu item name to open its settings and by clicking 'Add Icon' button select an icon from the list.

If you need to add submenu items, move them under the parent menu item and shift a little to the right side with drag-and-drop function. Click the Save Menu button on the right-hand side.

Once your menu is ready, assign it to the main menu location by checking a checkbox under the 'Menu Settings' title.

There is 3 location for the menu:


- Once it's done, click the Save Menu button on the right-hand side.