King Composer – Backend Editor
King Composer plugin comes bundled with Utouch and is the main page builder in the theme. It provides backend and frontend editors. You can use one that is more convenient for you.
To start editing with Backend Editor you need to:
- create a page under Pages>Add new tab,
- fill in Title field,
- click on the 'Edit with KingComposer' button to activate editor mode.
Table of contents:
- Adding elements
- Row settings
- Section management
Adding Elements
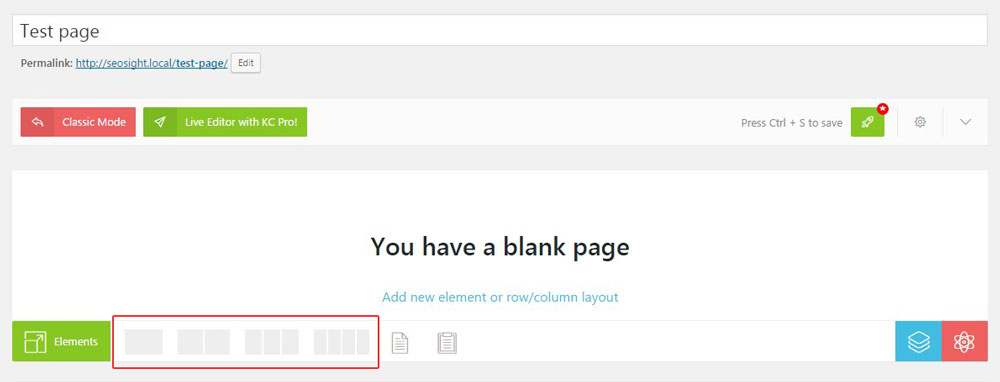
Start adding elements to your page. You can do it in two ways:
- Click on the 'Elements' button to add any element from the list.

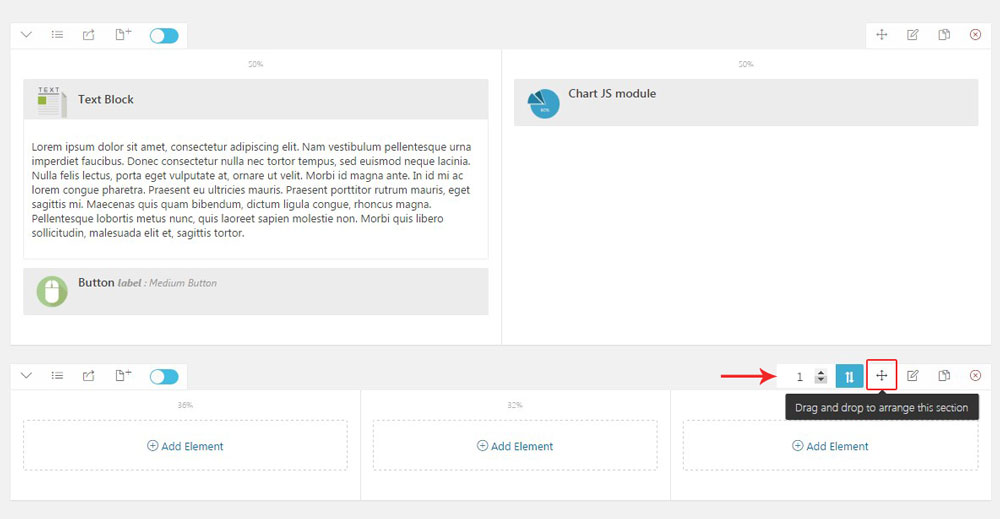
- You can choose column layout for your section first, and then add elements to each column by clicking on the 'Add Elements' link or 'PLUS' icon.

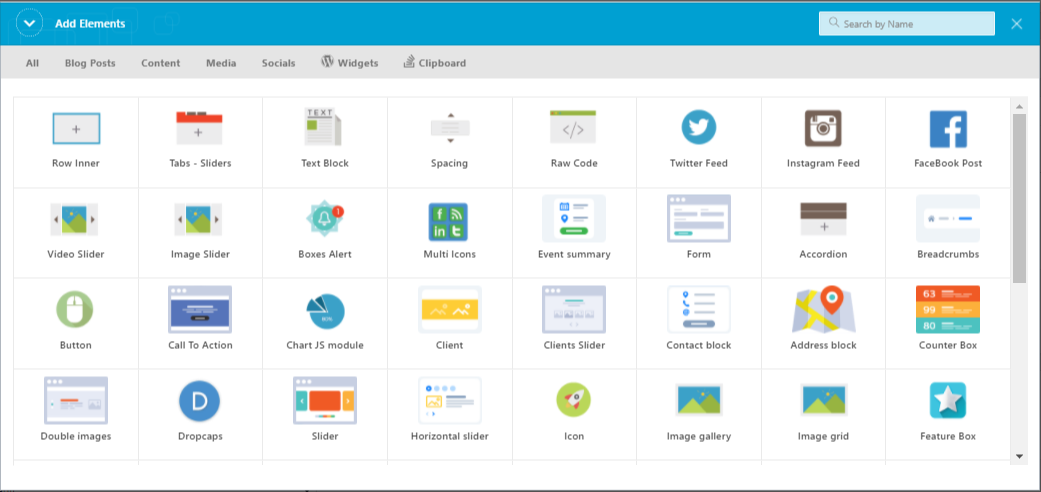
All KC elements are divided in tabs by functionality and have small thumbnails above titles to demonstrate their role in the theme.
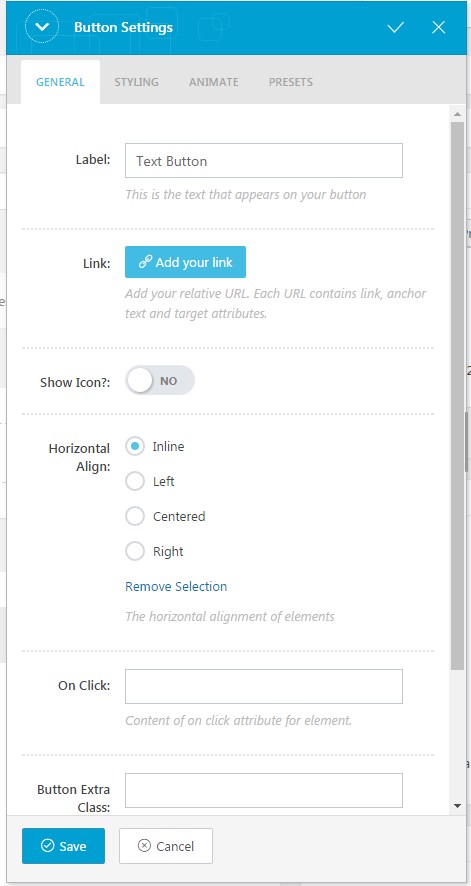
Each KC element has a lot of customization option that are also divided into tabs:
- 'General' tab - you can add content and configure main settings of the element.
- 'Styling' tab - allows you to customize design of your element - colors, font size nad font family, background color/images, paddings, margins, borders etc. Styling options are different for each element.
- 'Animation' tab - you can enable animation and choose animation type for particular element.
- 'Presets' tab- this option lets you save settings of the module and use them in another section or page.
Row Settings
Each section has a number of options that you can customize the way you want. Click on the 'PENCIL' icon on the top right corner of the section box to open row settings.
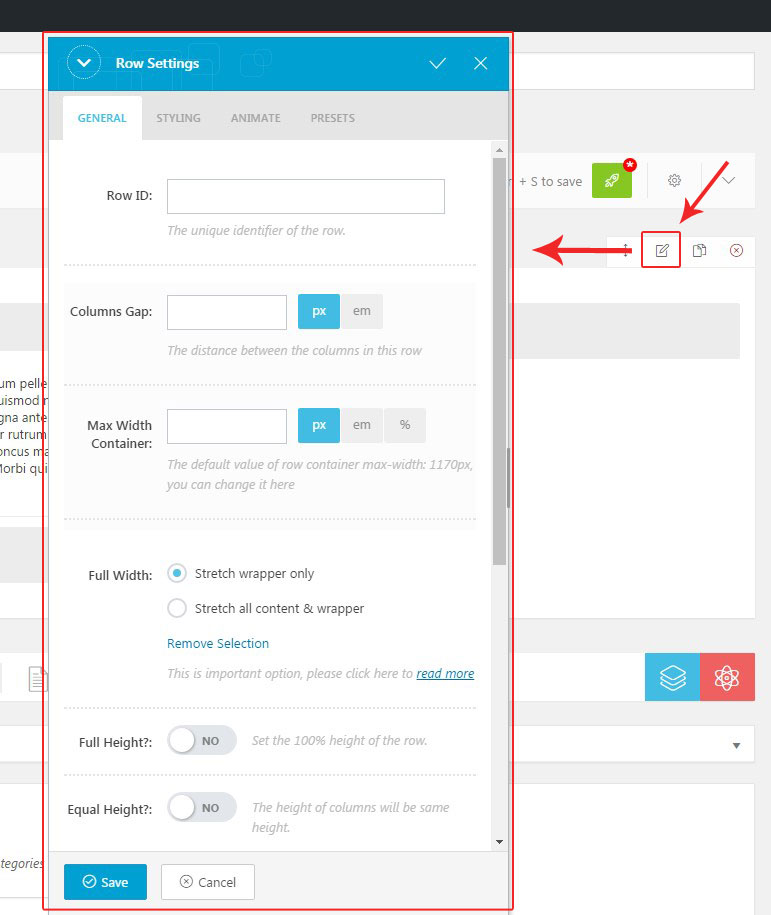
The row settings are:
- 'General' tab - here you can adjust: - dimentions of the row and columns - set Youtube video or Parallax image background - add row ID and extra class names for the row and container
- 'Styling' tab: - Typography options - Background options - Box options - margins,paddings, borders of the row. - Custom - here you can add custom CSS codes that will be applied to the current row.
- 'Animation' tab - you can enable animation effect, animation speed and delay for the current row.
- 'Presets' tab - this option lets you save settings of the row and apply them in other rows on the current or other pages.
Section Management
There is number of options allowing to manage sections on page according your needs. They are:
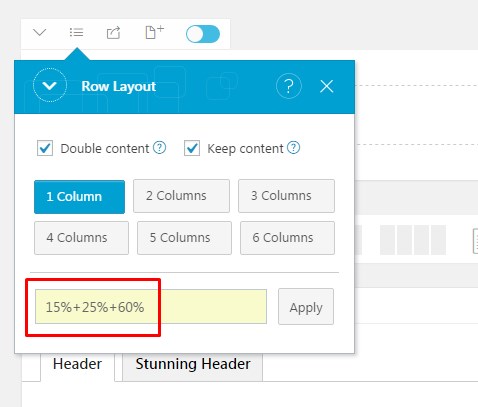
- Columns number
- Custom columns width
- Rows reorder
- Publish/unpublish rows
- Copy rows and elements
- Save rows
- Columns number. You can change number of columns in the row whenever you want. Simply click on the 'LIST' icon on the top left corner of the section box and select required column number.

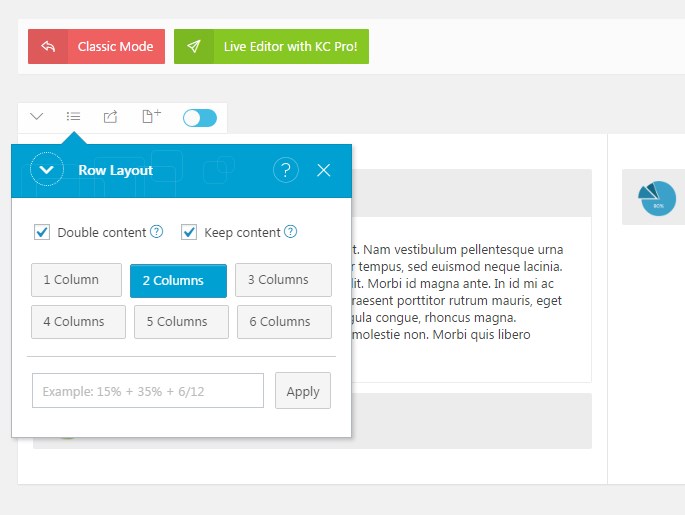
- Custom columns width. You can set custom column width in the row. There are two ways to do this: - click on the 'LIST' icon on the top left corner of the section box and enter columns width in % into the input field. The total number must be 100%.
 - put cursor over the columns border and move it to left or right changing size of the column.
- Rows reorder. You can reorder rows on page in two ways: - Hover over 'CURSOR MOVE' icon on the top right corner of the section box. In the appeared box enter order number of your row and click on the blue buttom with arrows.
 - Hold the 'CURSOR MOVE' icon with left mouse and move the row to the target location on page.
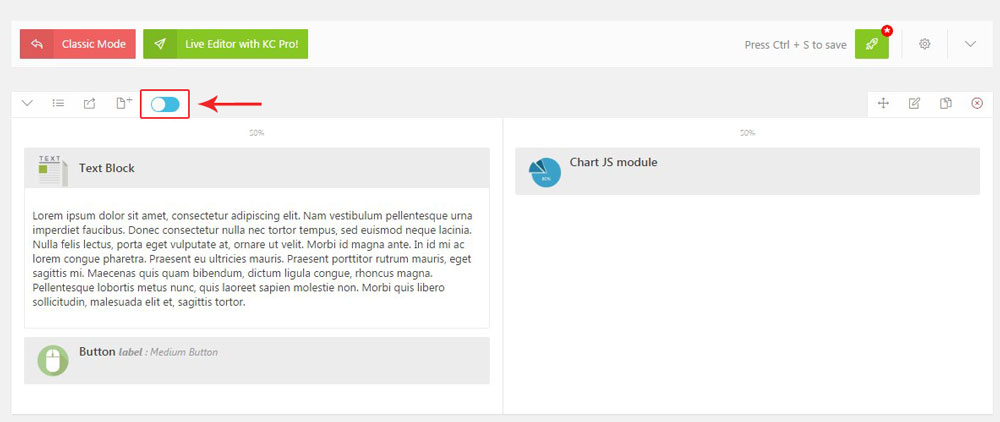
 - Publish/unpublish rows. You can unpublish selected rows, if you don't want them to be visible on the frontend. Simply click on the blue toggle to disable the row. Click on the gray toggle to enable it again.
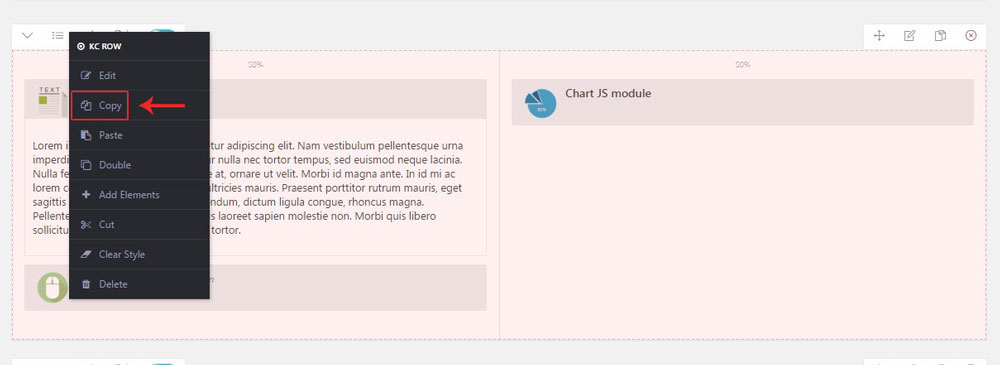
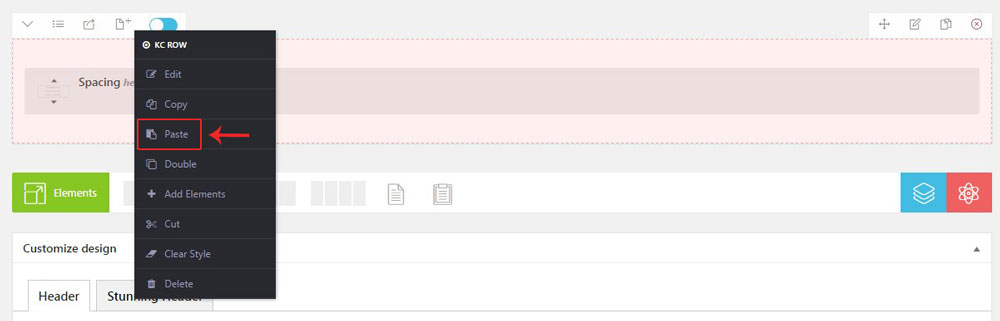
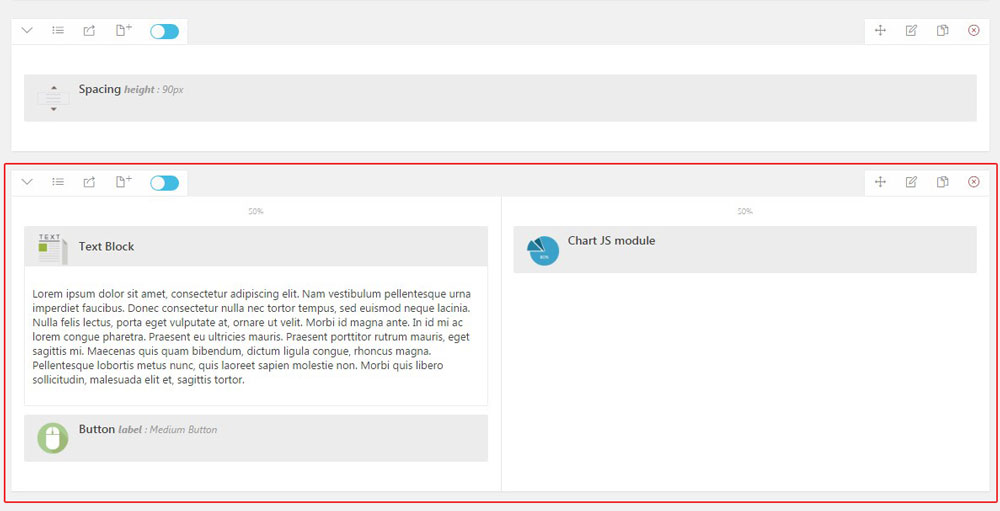
- Copy rows and element. You can copy created rows and elements and paste them to any place in the editor. Call contextual menu with the right mouse click over row or element. Select 'Copy' option. Click over another row/element with right mouse and select 'Paste' option. The row or element will stand below it.
 Or click on the 'PASTE COPIED ELEMENT' button on the bottom bar.
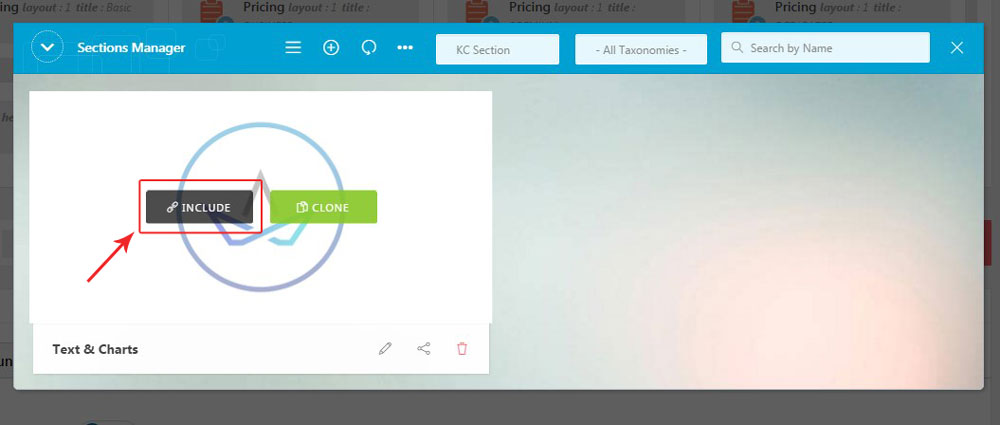
- Save rows. You can save created rows as presets and use them later on other pages. Click on the middle icon on the top left corner of the section box.
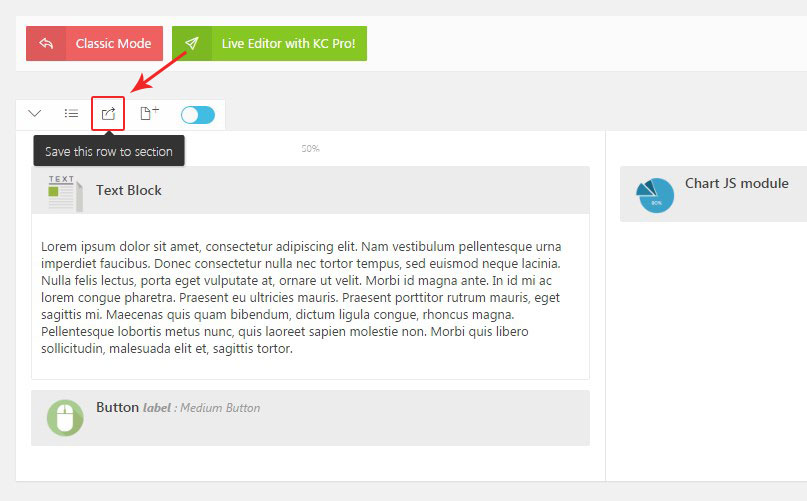 In the appeared popup click on the 'PLUS' icon.
 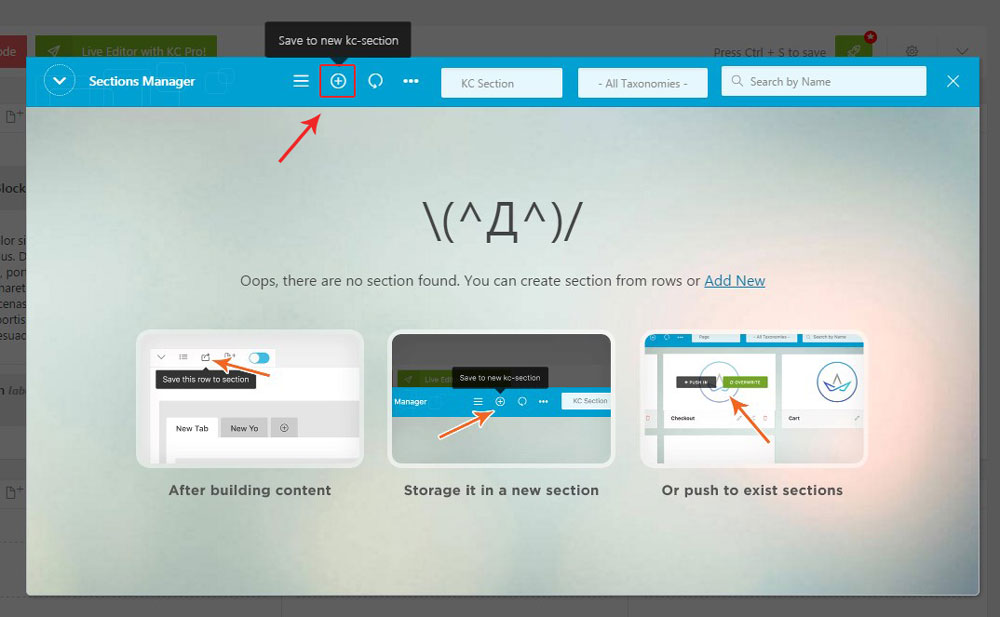 You will be redirected to a new page. All you have to do is to give title to your section and click on the 'Publish' button to save changes.
 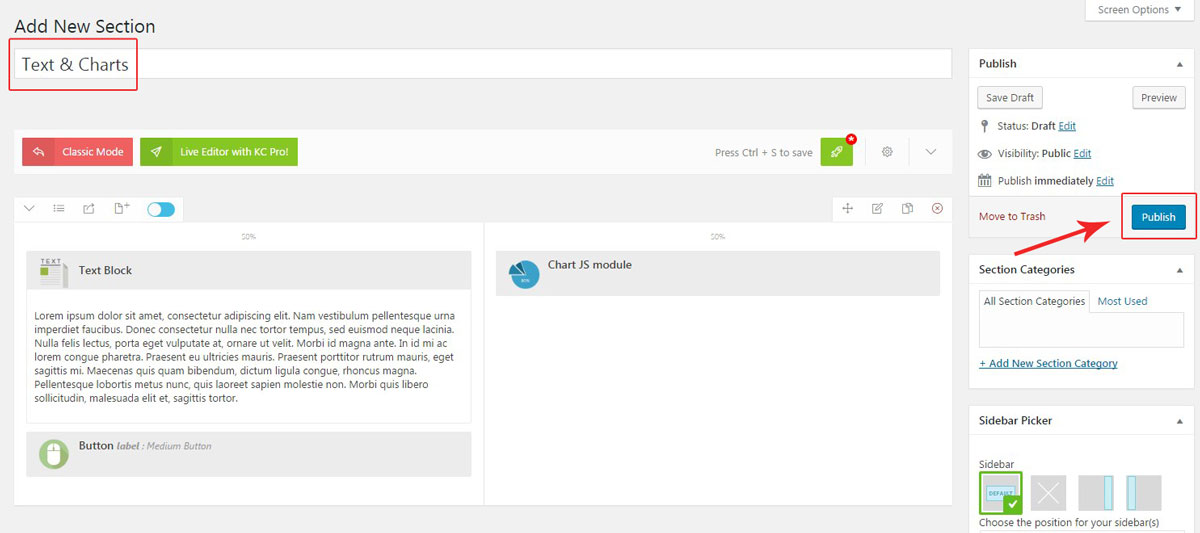 In order to use the saved section, click on the blue icon on the bottom bar of the editor and select it from the appeared popup.